
How To Fix Chipped Tile? The Easiest Guide You’ll Ever Find
Table of Contents
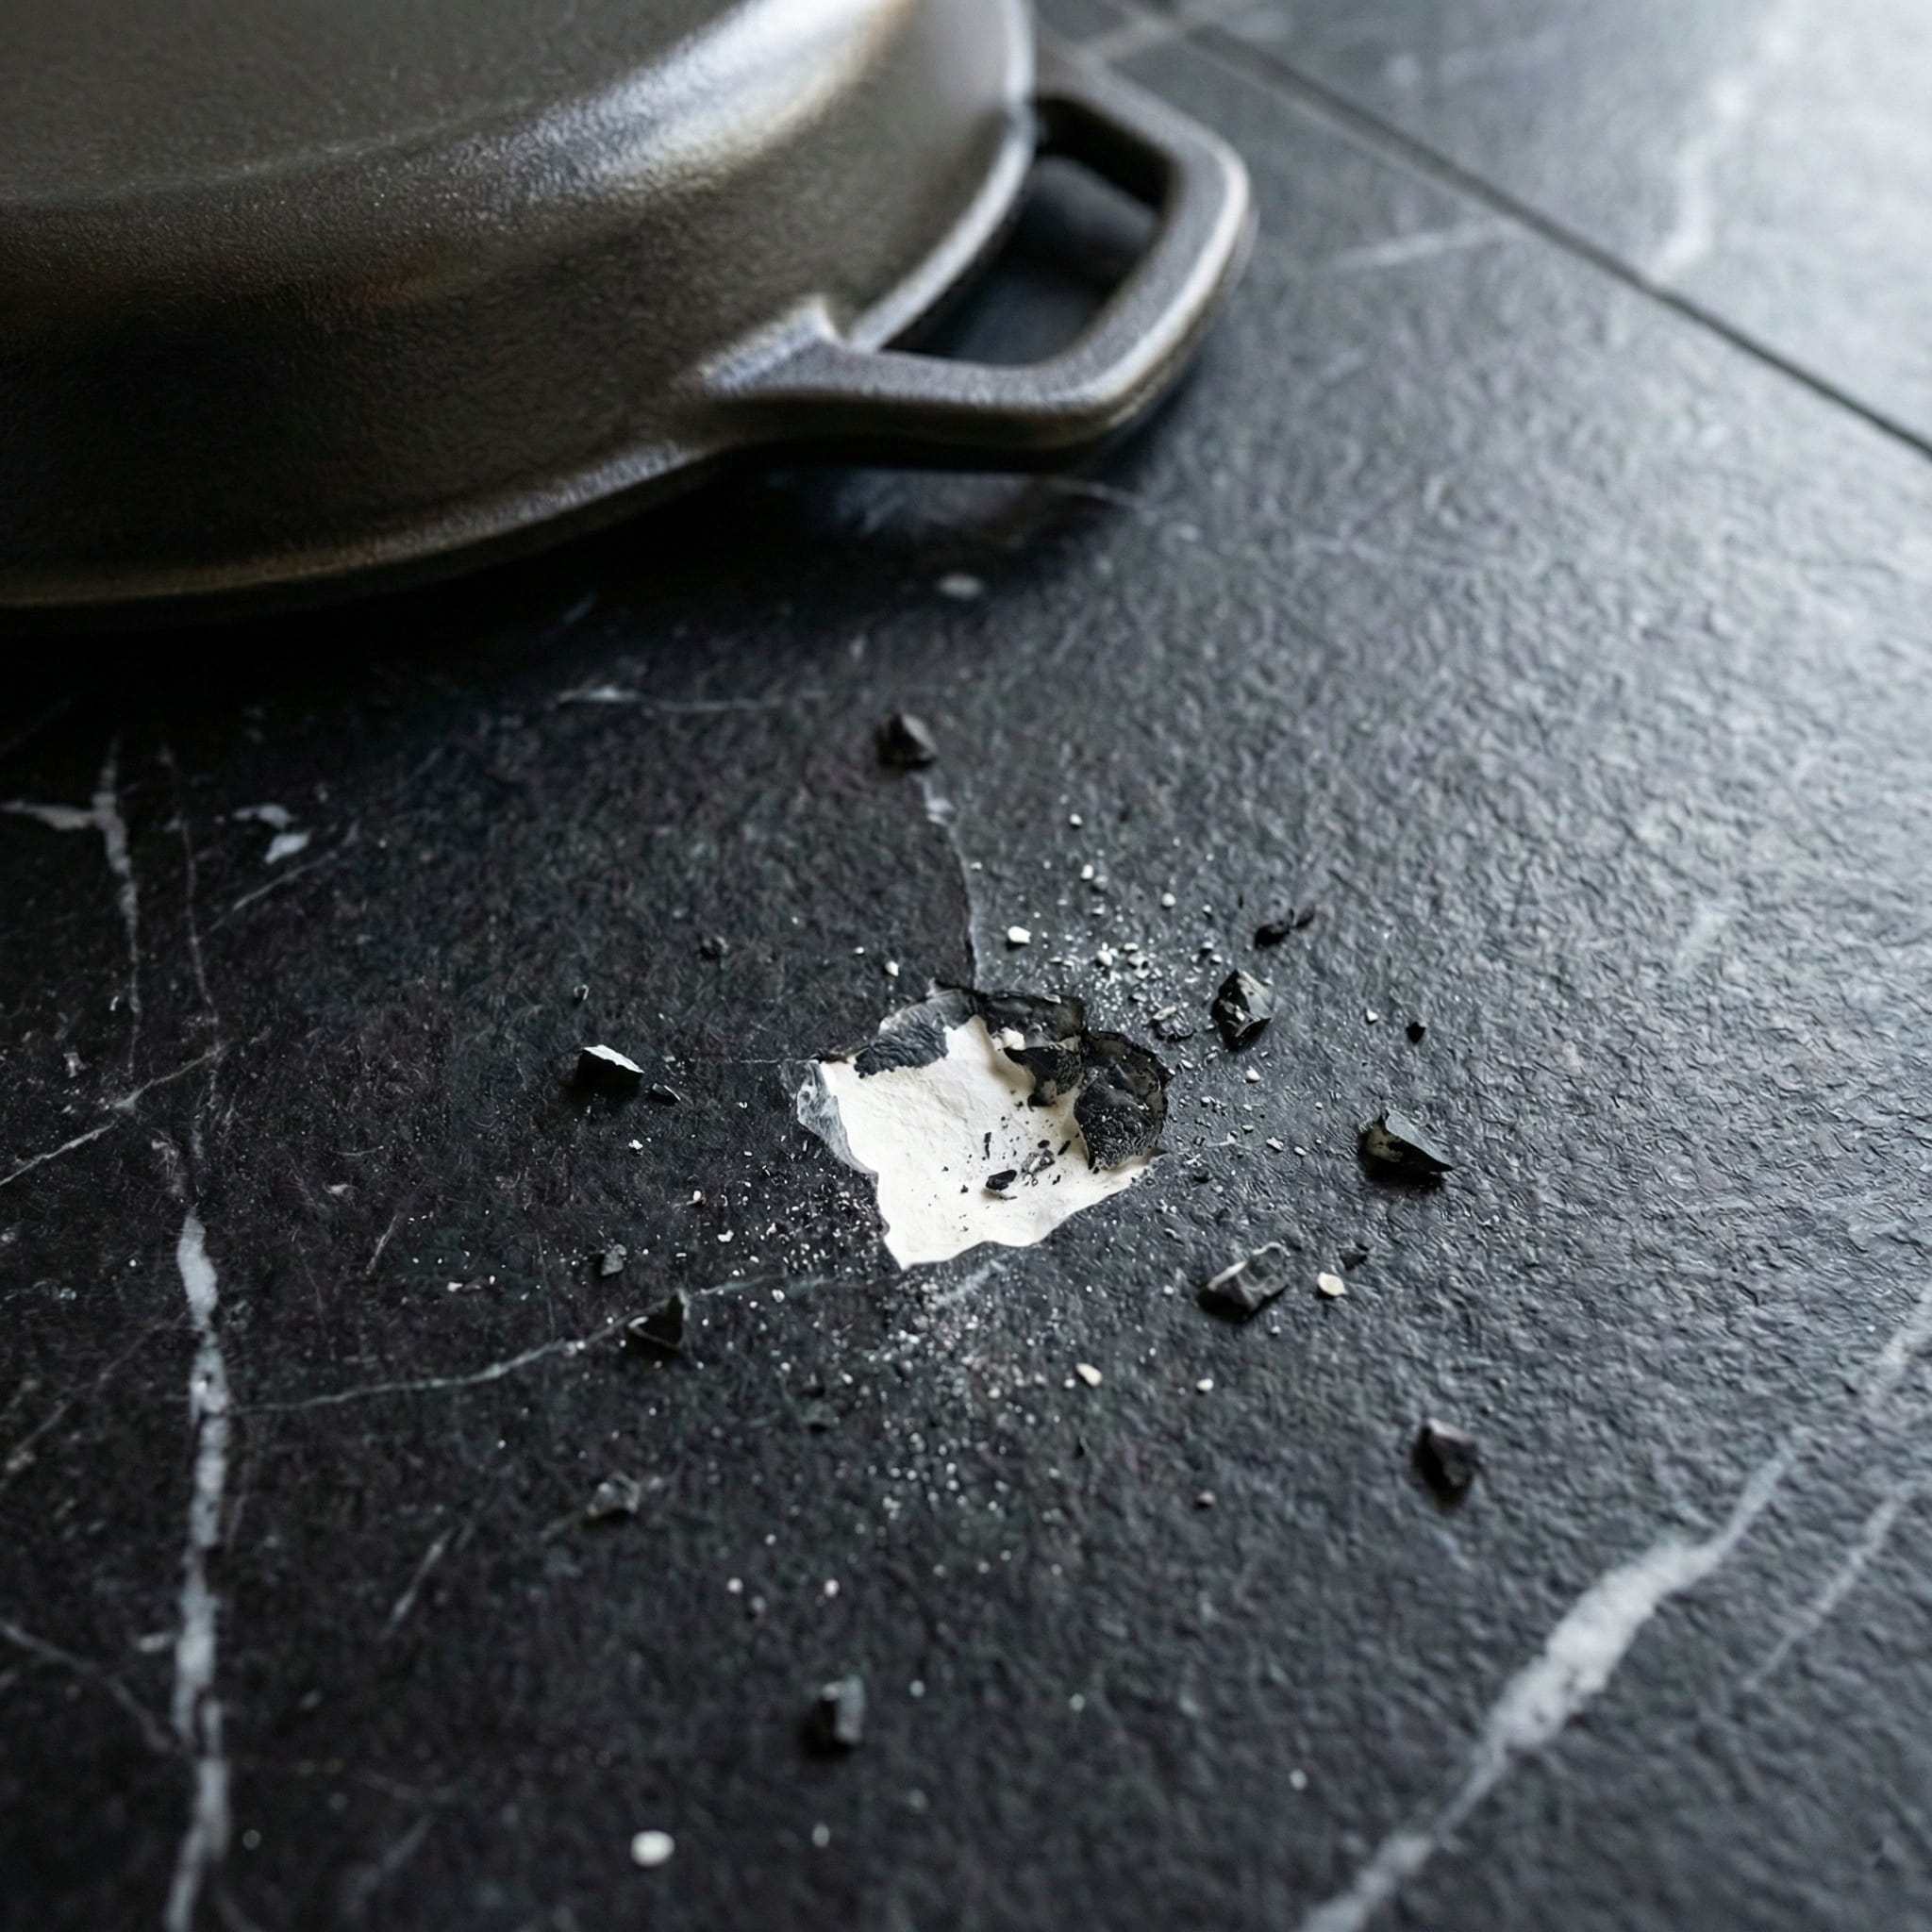
At Stone Tile Depot, we like to answer your questions, like how to fix a cracked tile with our experienced team! The second you’ve read the title, you’ve imagined the scene, right? It happens in slow motion: a heavy pan or metal kitchen appliance slips from your hand, hits the kitchen floor tile, and the sad sound comes after that, it cracks. You stare down at the jagged white divot in your beautiful flooring, wondering if you have to rip up the entire floor. Now, take a deep breath and let me share the good news: you don’t. Whether it’s a shower floor tile or a prominent spot on your kitchen backsplash tile, learning how to fix chipped tile is actually one of the simplest home repairs you can master, and it’s one of the skills you can brag about.
What Do You Need? Check Your DIY Toolbox
Before you start, grab these simple supplies. You likely have half of them under your sink already:
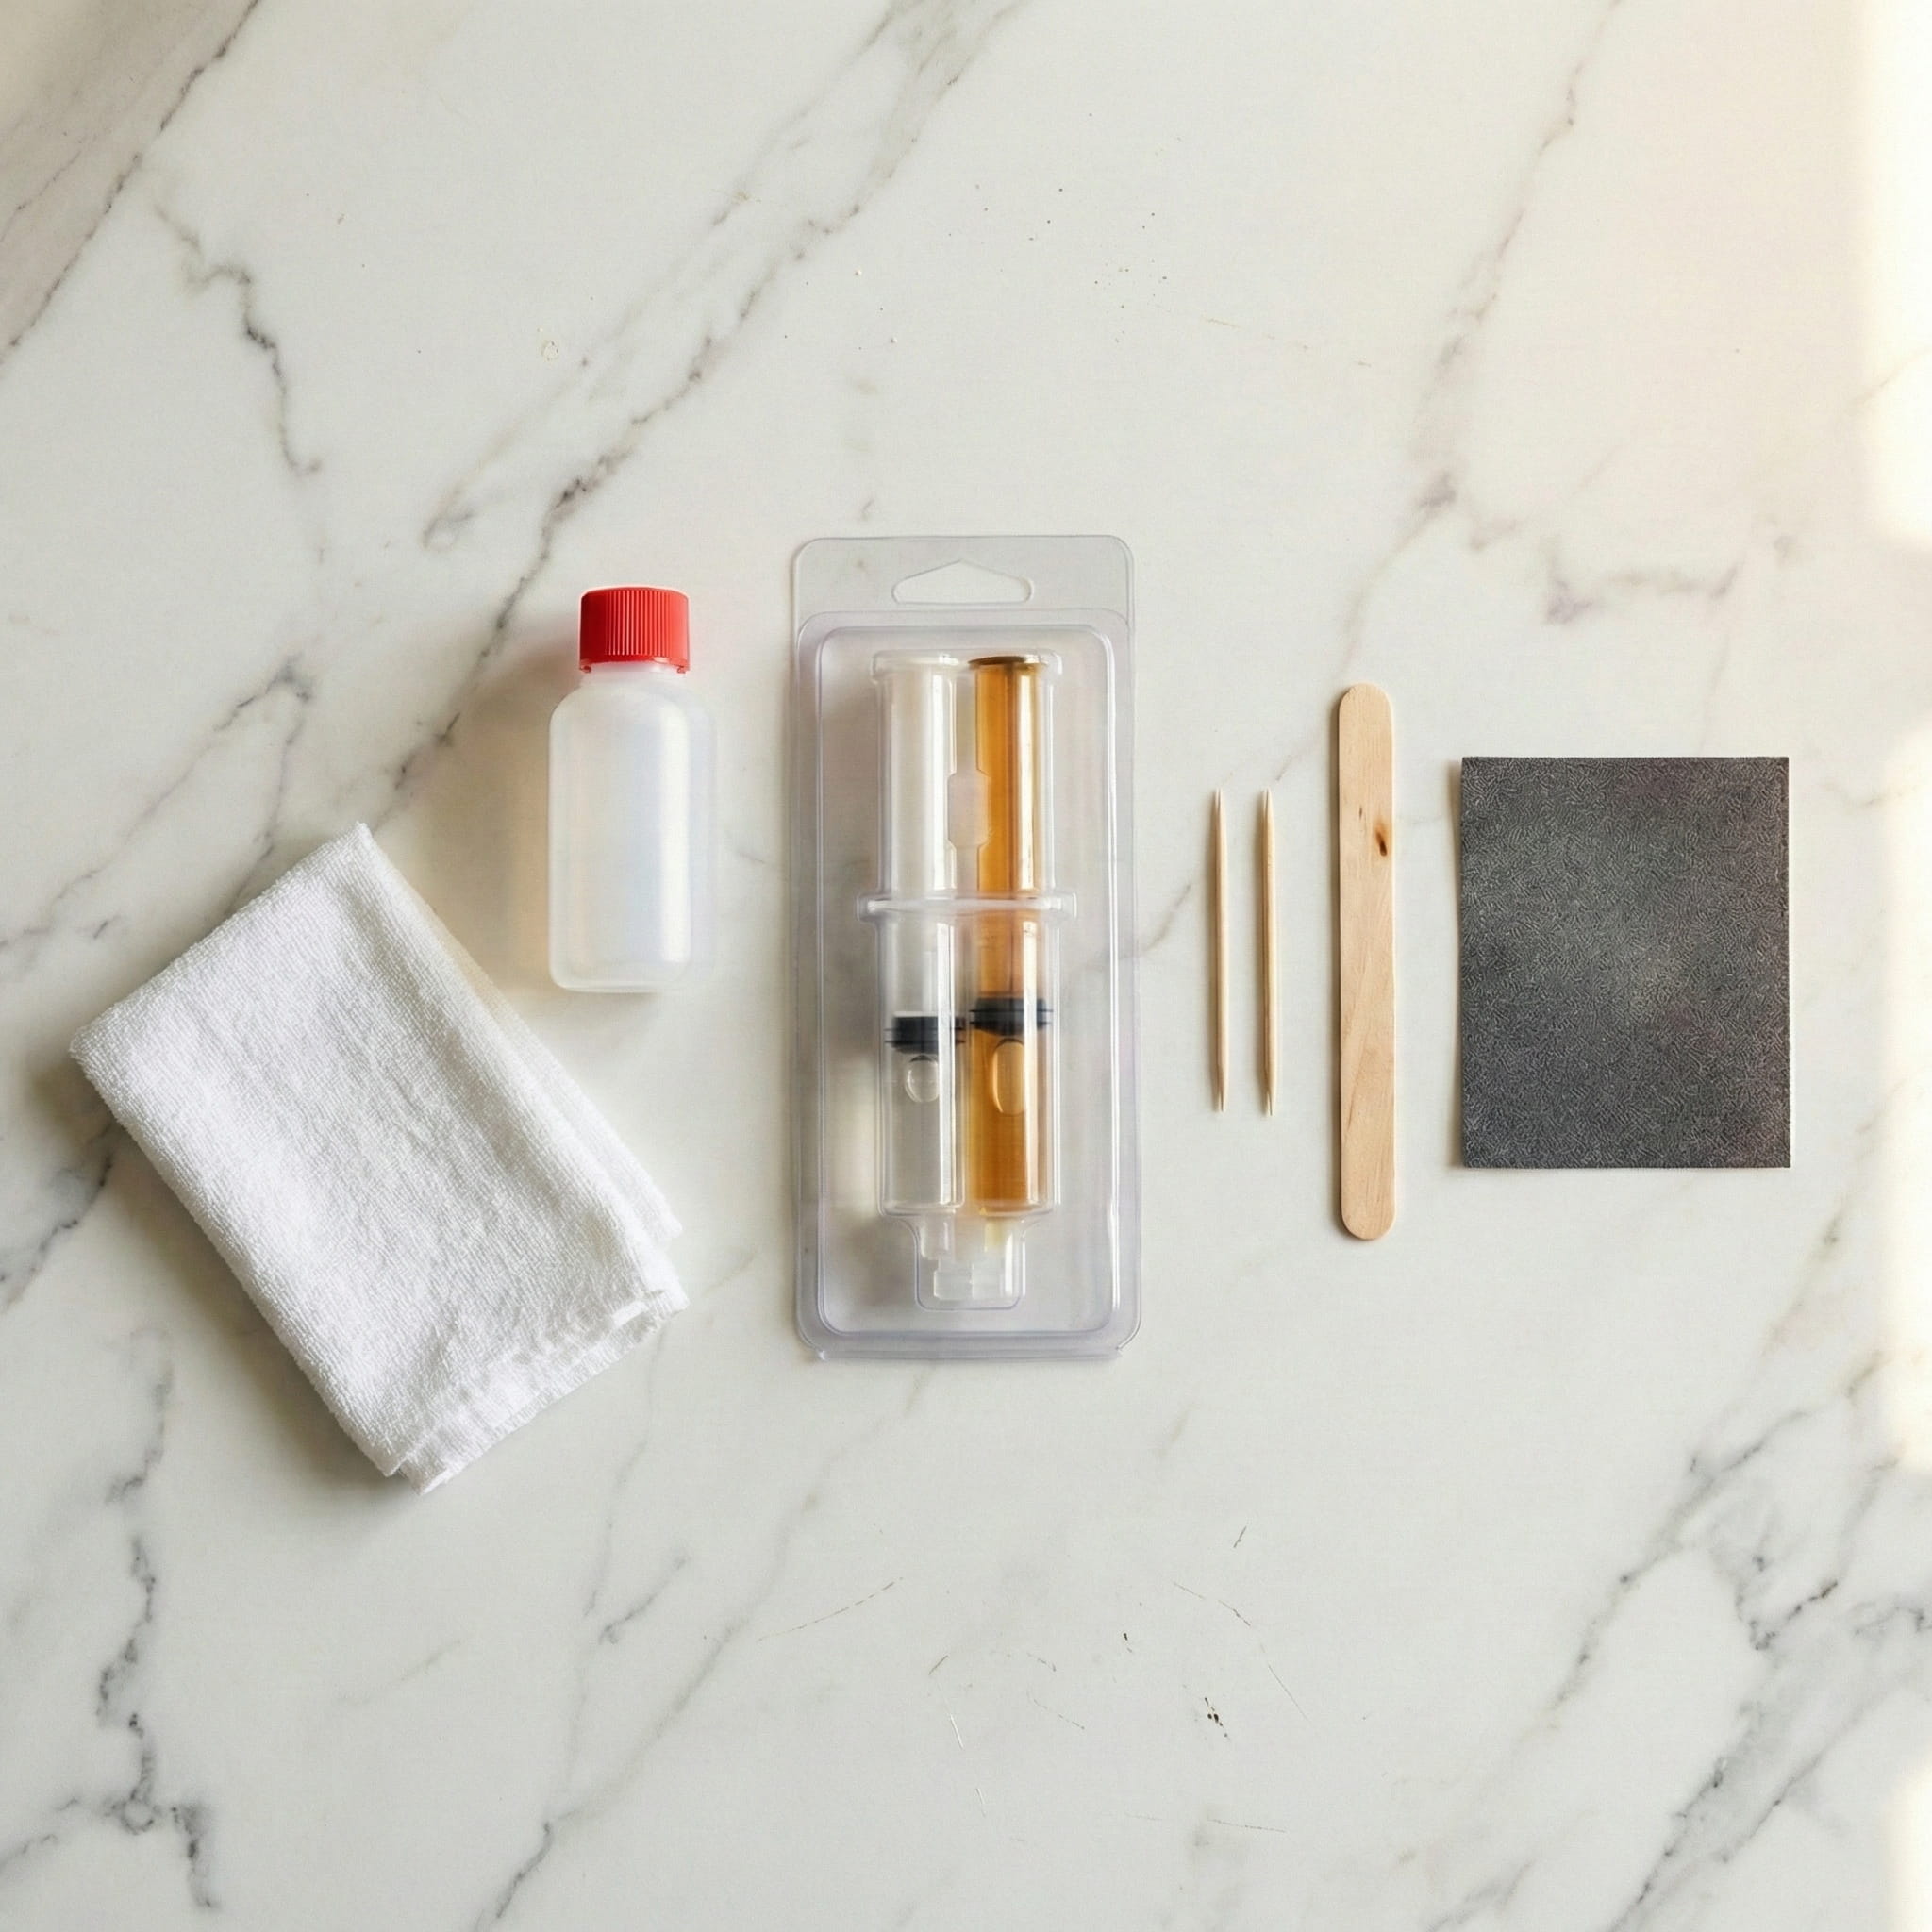
- Cleaning Supplies: Rubbing alcohol and a clean rag (crucial for prep).
- The Filler: A tile repair kit or 2 part epoxy (clear for stone, white or colored for ceramic tiles and porcelain tiles, according to their shade).
- Color Matchers: Tile paint or the tintable dyes often included in repair kits.
- Applicator: A toothpick, popsicle stick, or small putty knife.
- Finishing Touch: Fine grit sandpaper (optional, for smoothing the dried epoxy).
Step 1: Assess the Damage (Cracked vs Chipped Tile)
Before you run to the hardware store, look closely at the damage. There is a big difference between cracked vs chipped tile, and it is okay if you can’t tell the difference when you first look at it.
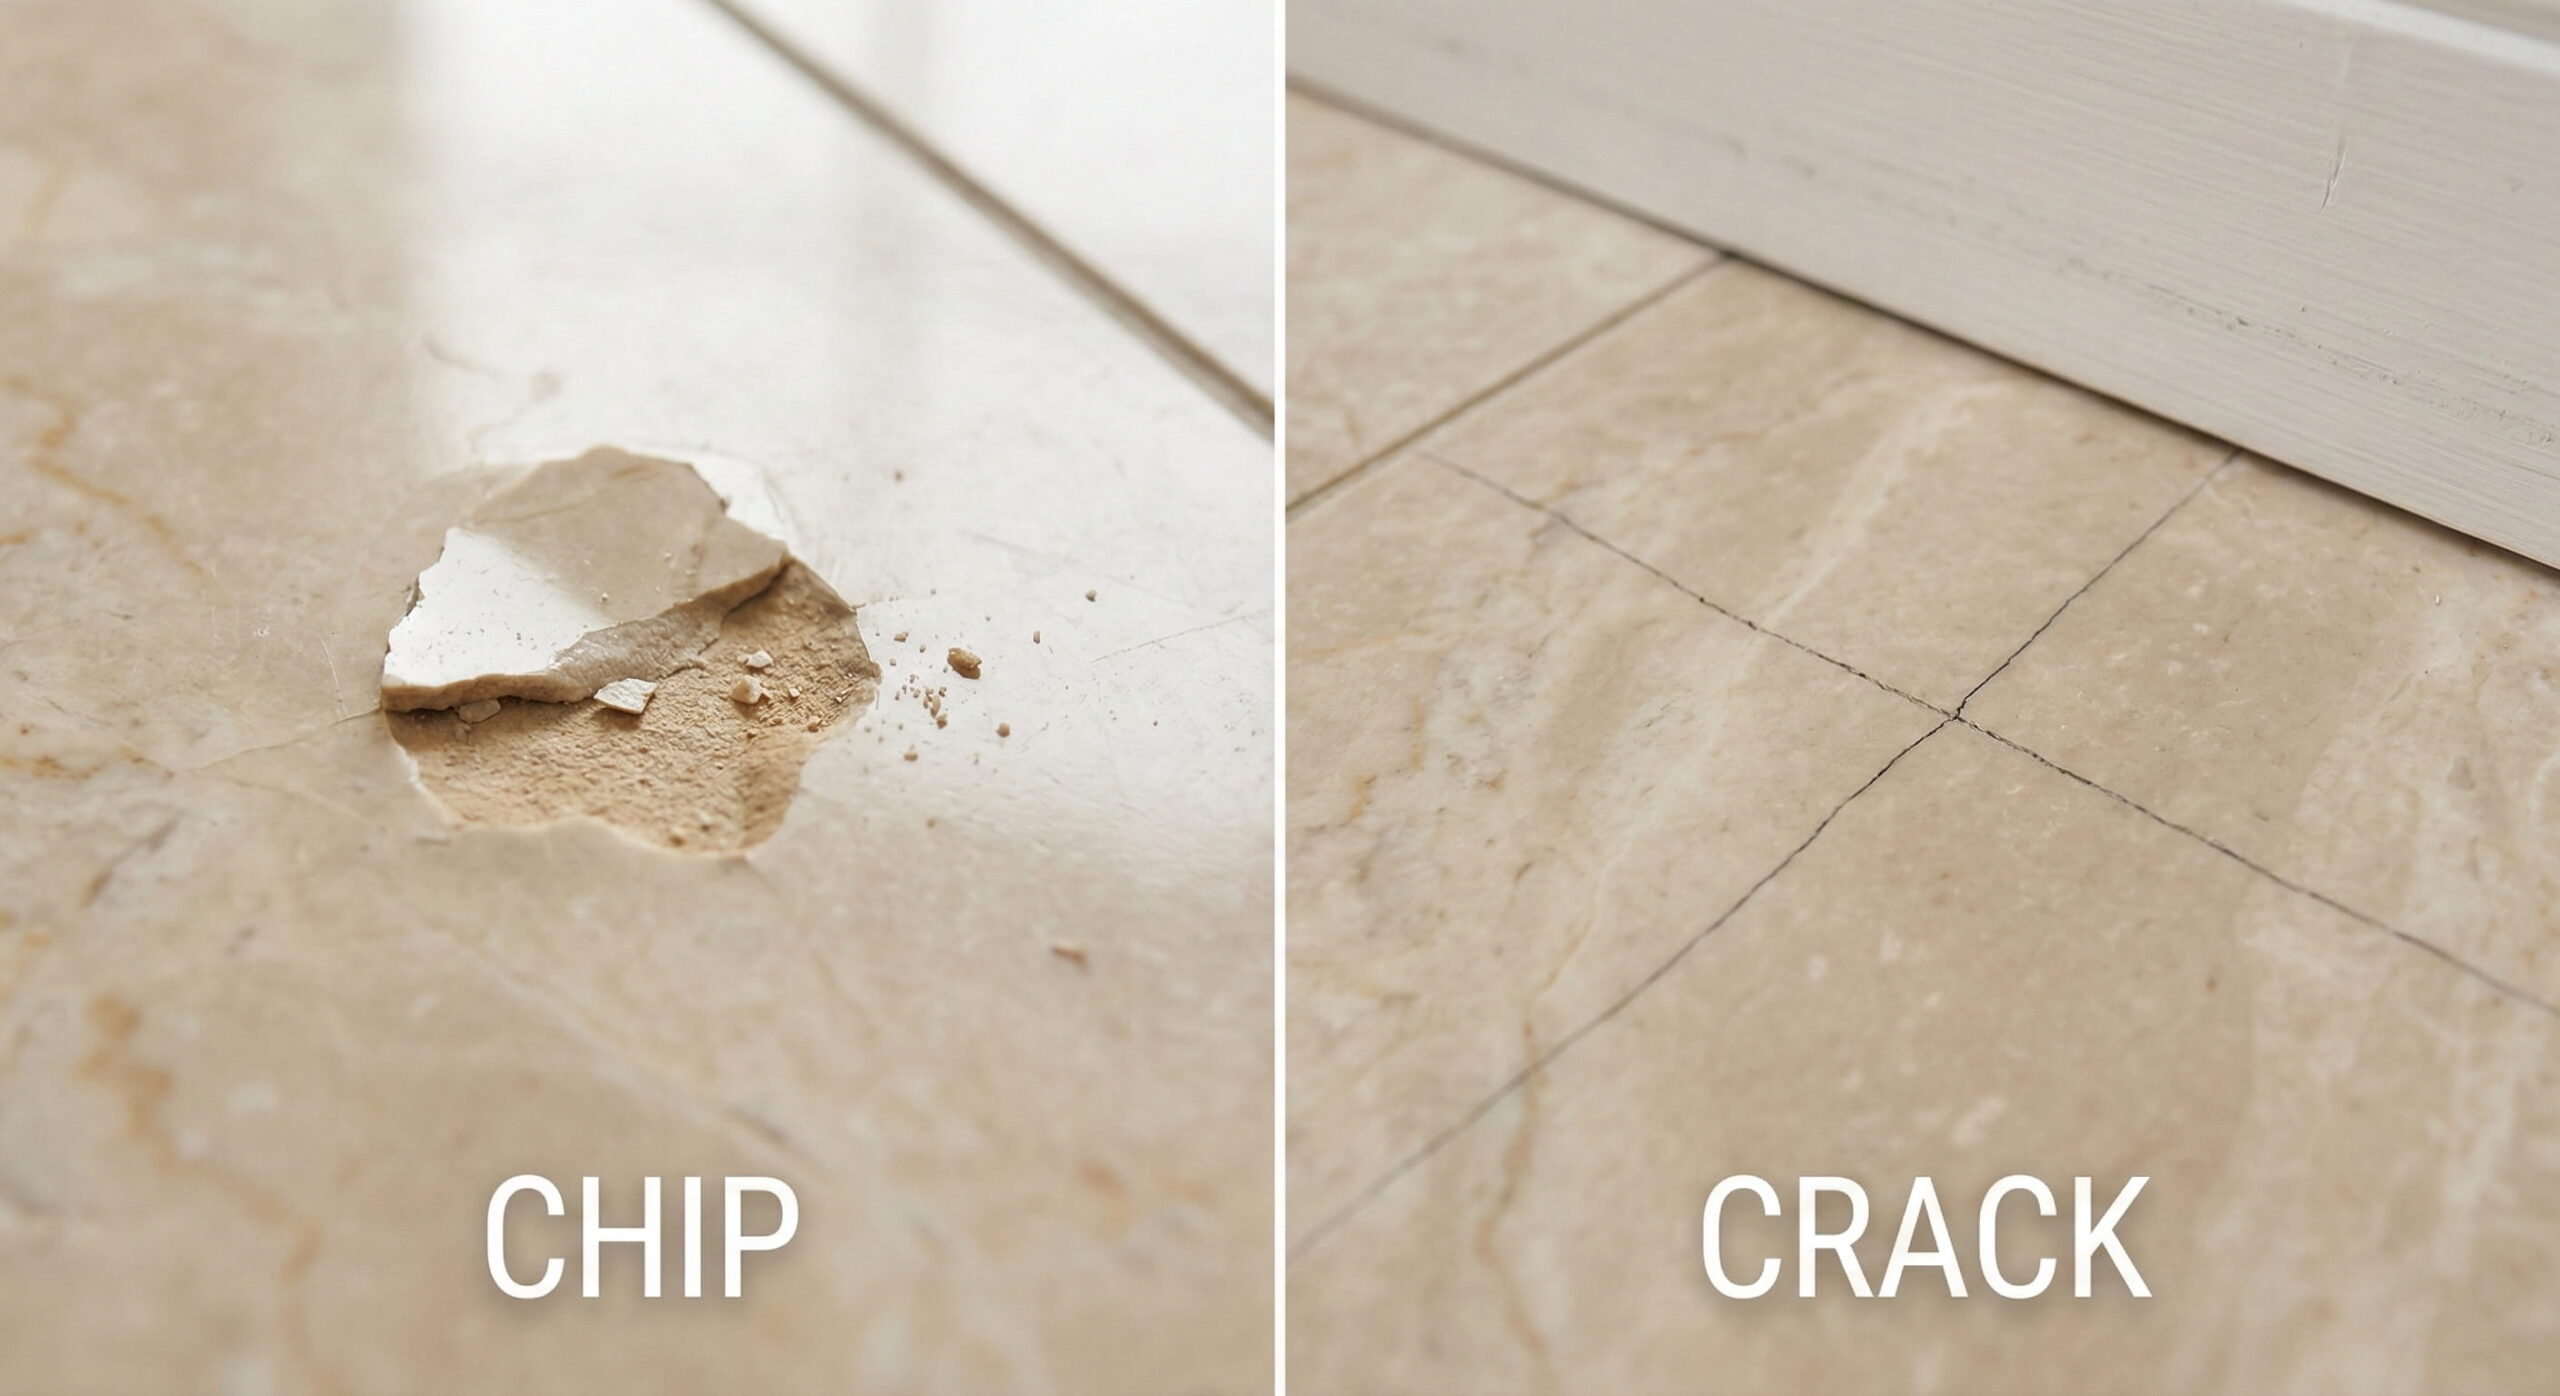
A chip is superficial; a piece of the glaze or top layer has flaked off, but the body of the tile is still strong. This is the perfect candidate for a DIY tile repair. However, if you see a hairline fracture running across the entire length of the tile, unfortunately, that’s a crack. But don’t worry, you know we got this! Cracks often indicate movement in the subfloor or improper installation. While you can patch a crack, it will likely come back. In that case, the debate of replace or repair tile usually leans toward replacement. But if it’s just a chip? You can fix that in minutes.
Step 2: Cleaning Tile and Prep, Don’t Skip That!
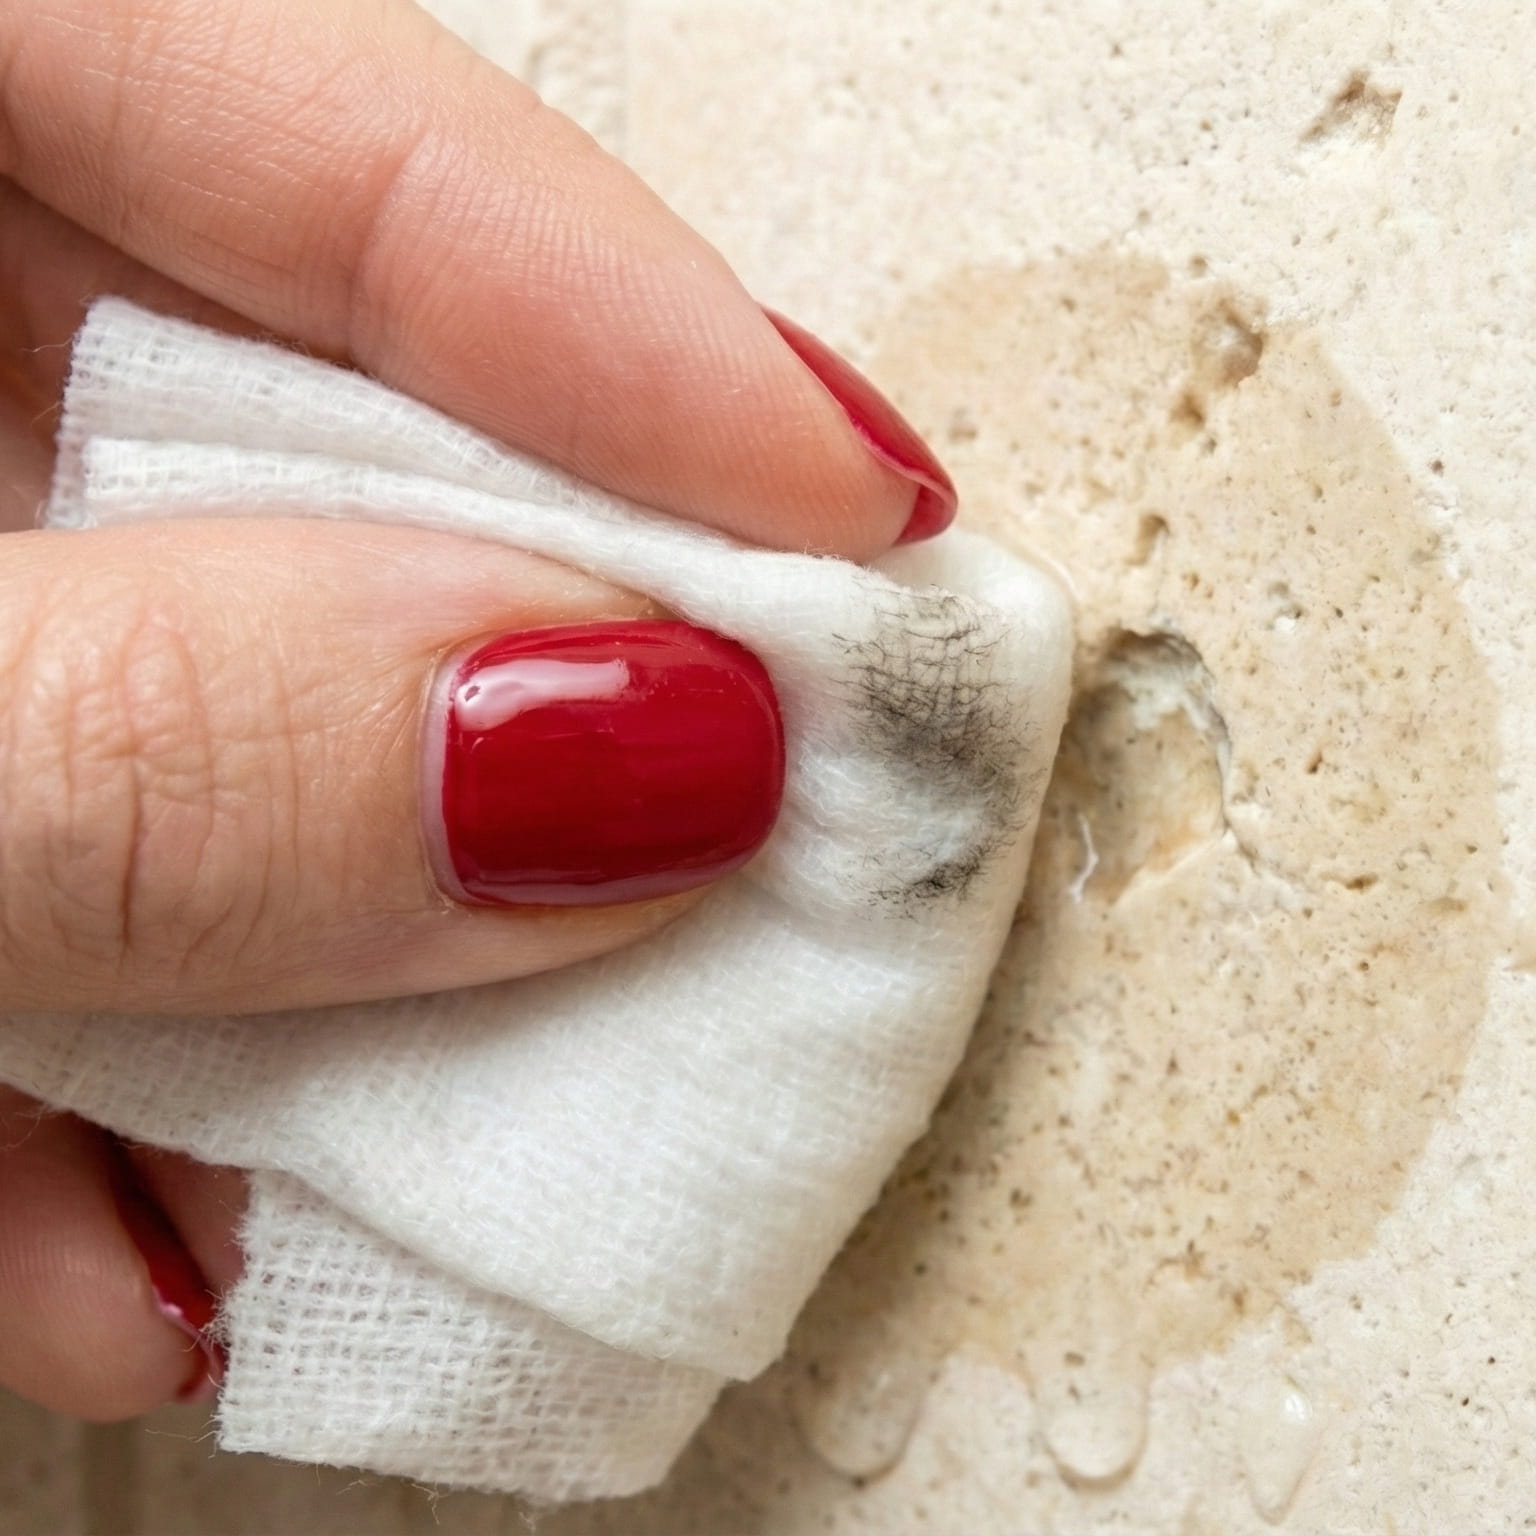
This is the part that is mostly skipped by our customers, but you need to listen to me: the secret to an invisible repair is cleanliness. If you are fixing a shower floor tile, you need to remove every trace of soap residue. For a kitchen floor tile, scrubbing out grease and dirt is a must, and you can’t skip that part; it’ll look bad and lower your work’s quality. Use a little rubbing alcohol to clean the chip and the surrounding area. This provides your filler bonds permanently to the stone or ceramic. If you skip this, your repair will pop out the next time you mop. You wouldn’t want to repeat it again and again. So please make it only one time, but in a good way.
Step 3: Fill It In, Magic Begins Here
For most repairs, a standard tile repair kit is your best friend. These kits usually come with a putty or liquid epoxy that hardens like a natural stone.
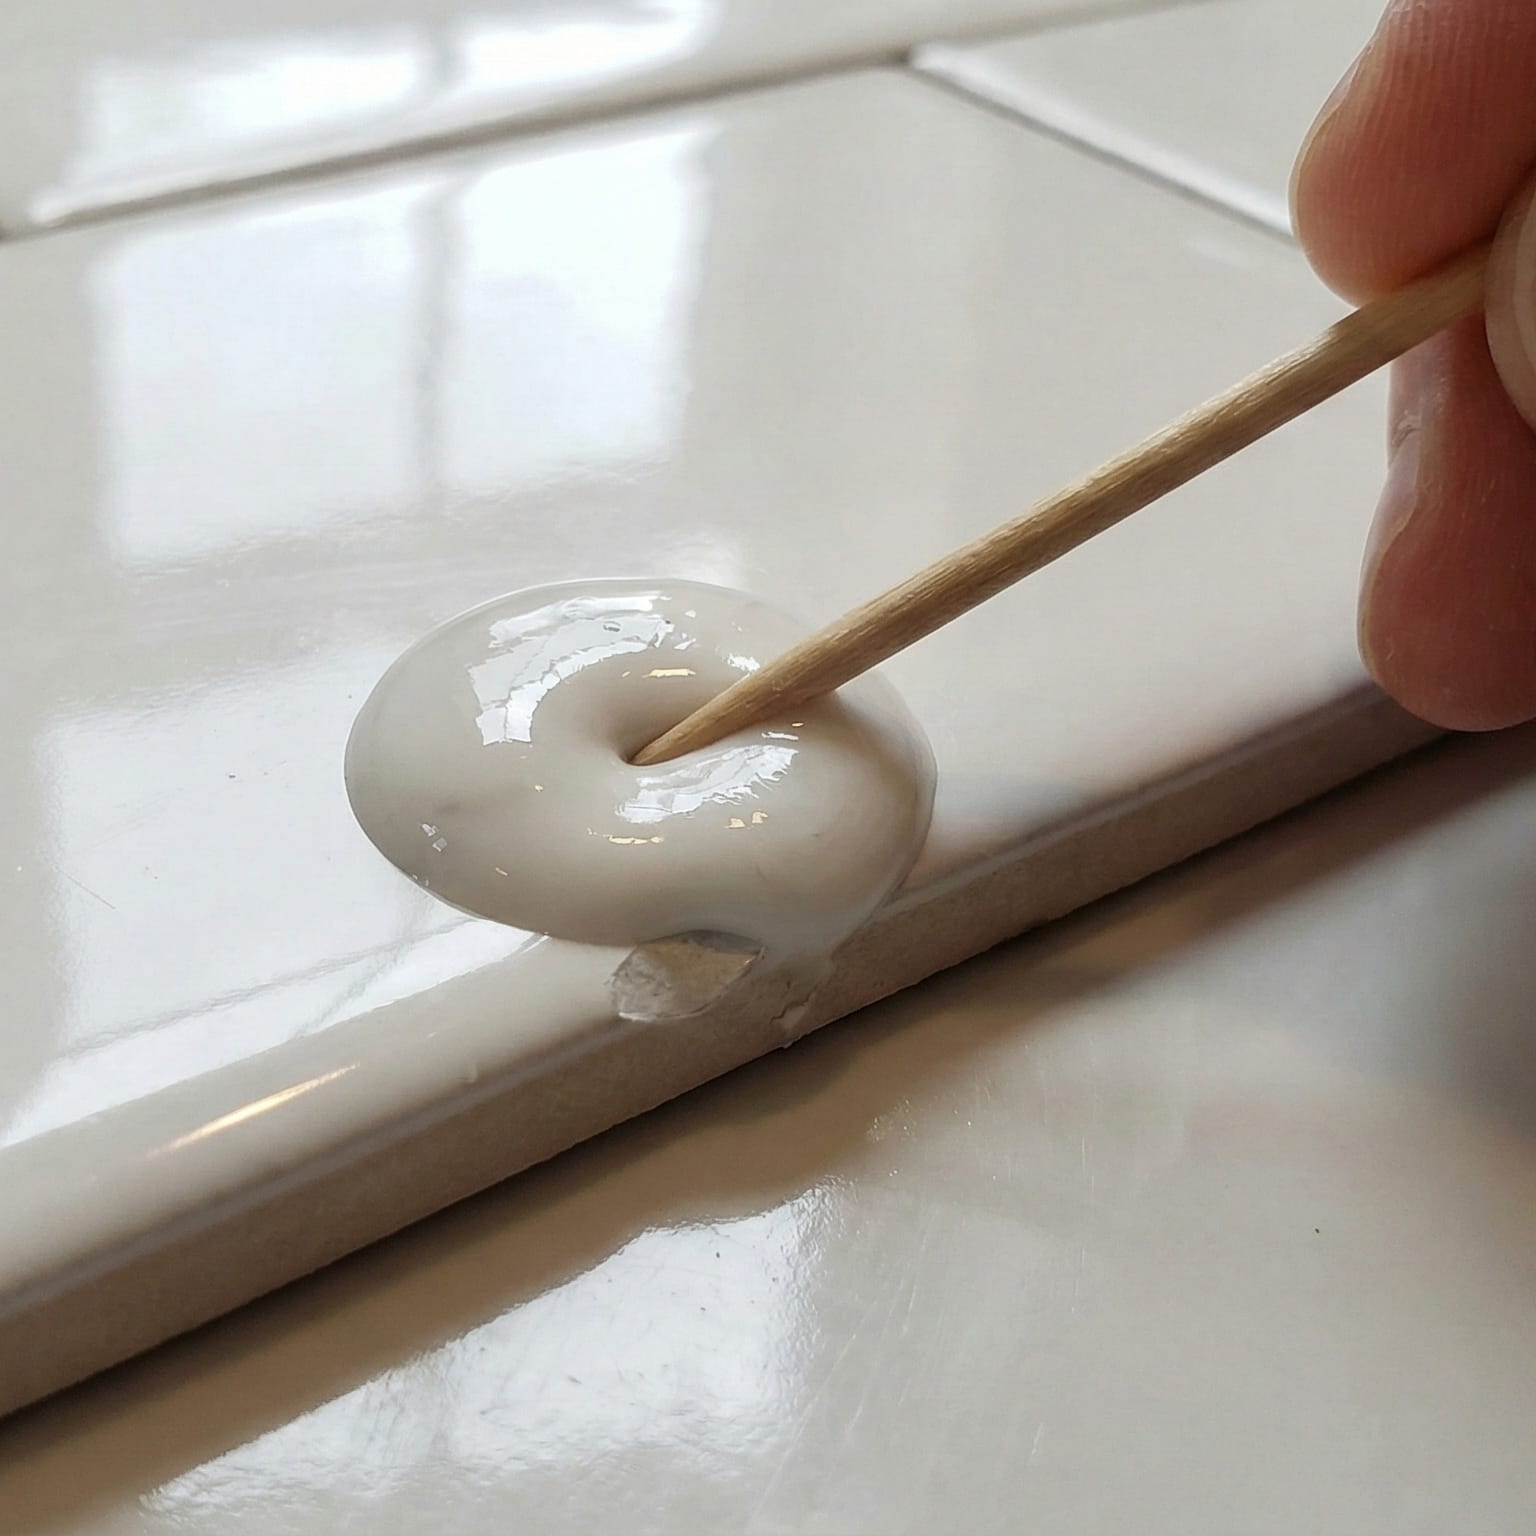
- For Ceramic Tiles: If you are learning how to fix chipped ceramic tile, a 2 part epoxy works like a magic potion that fixes everything with sparkles. Mix it up, overfill the chip slightly (because it shrinks as it dries), and smooth it out. And you’re done with that step!
- For Natural Stone Tiles: Natural stone repair requires a bit more detail and needs more attention. Clear epoxy is often best for natural stone tiles like travertine tile or marble, because it’s important to keep that natural beauty shining and in its best version.
Step 4: Painting Tile to Match (Optional, but Take a Look)
This is the part where you’re showing all of your artistic skills. But it’s controversial whether painting tile is necessary or not; you can just read our blog and learn more about it. If you have a solid white ceramic wall tile, standard white filler will work fine, and you won’t need anything else. But for a black floor tile or a beige travertine, you will probably need to blend.
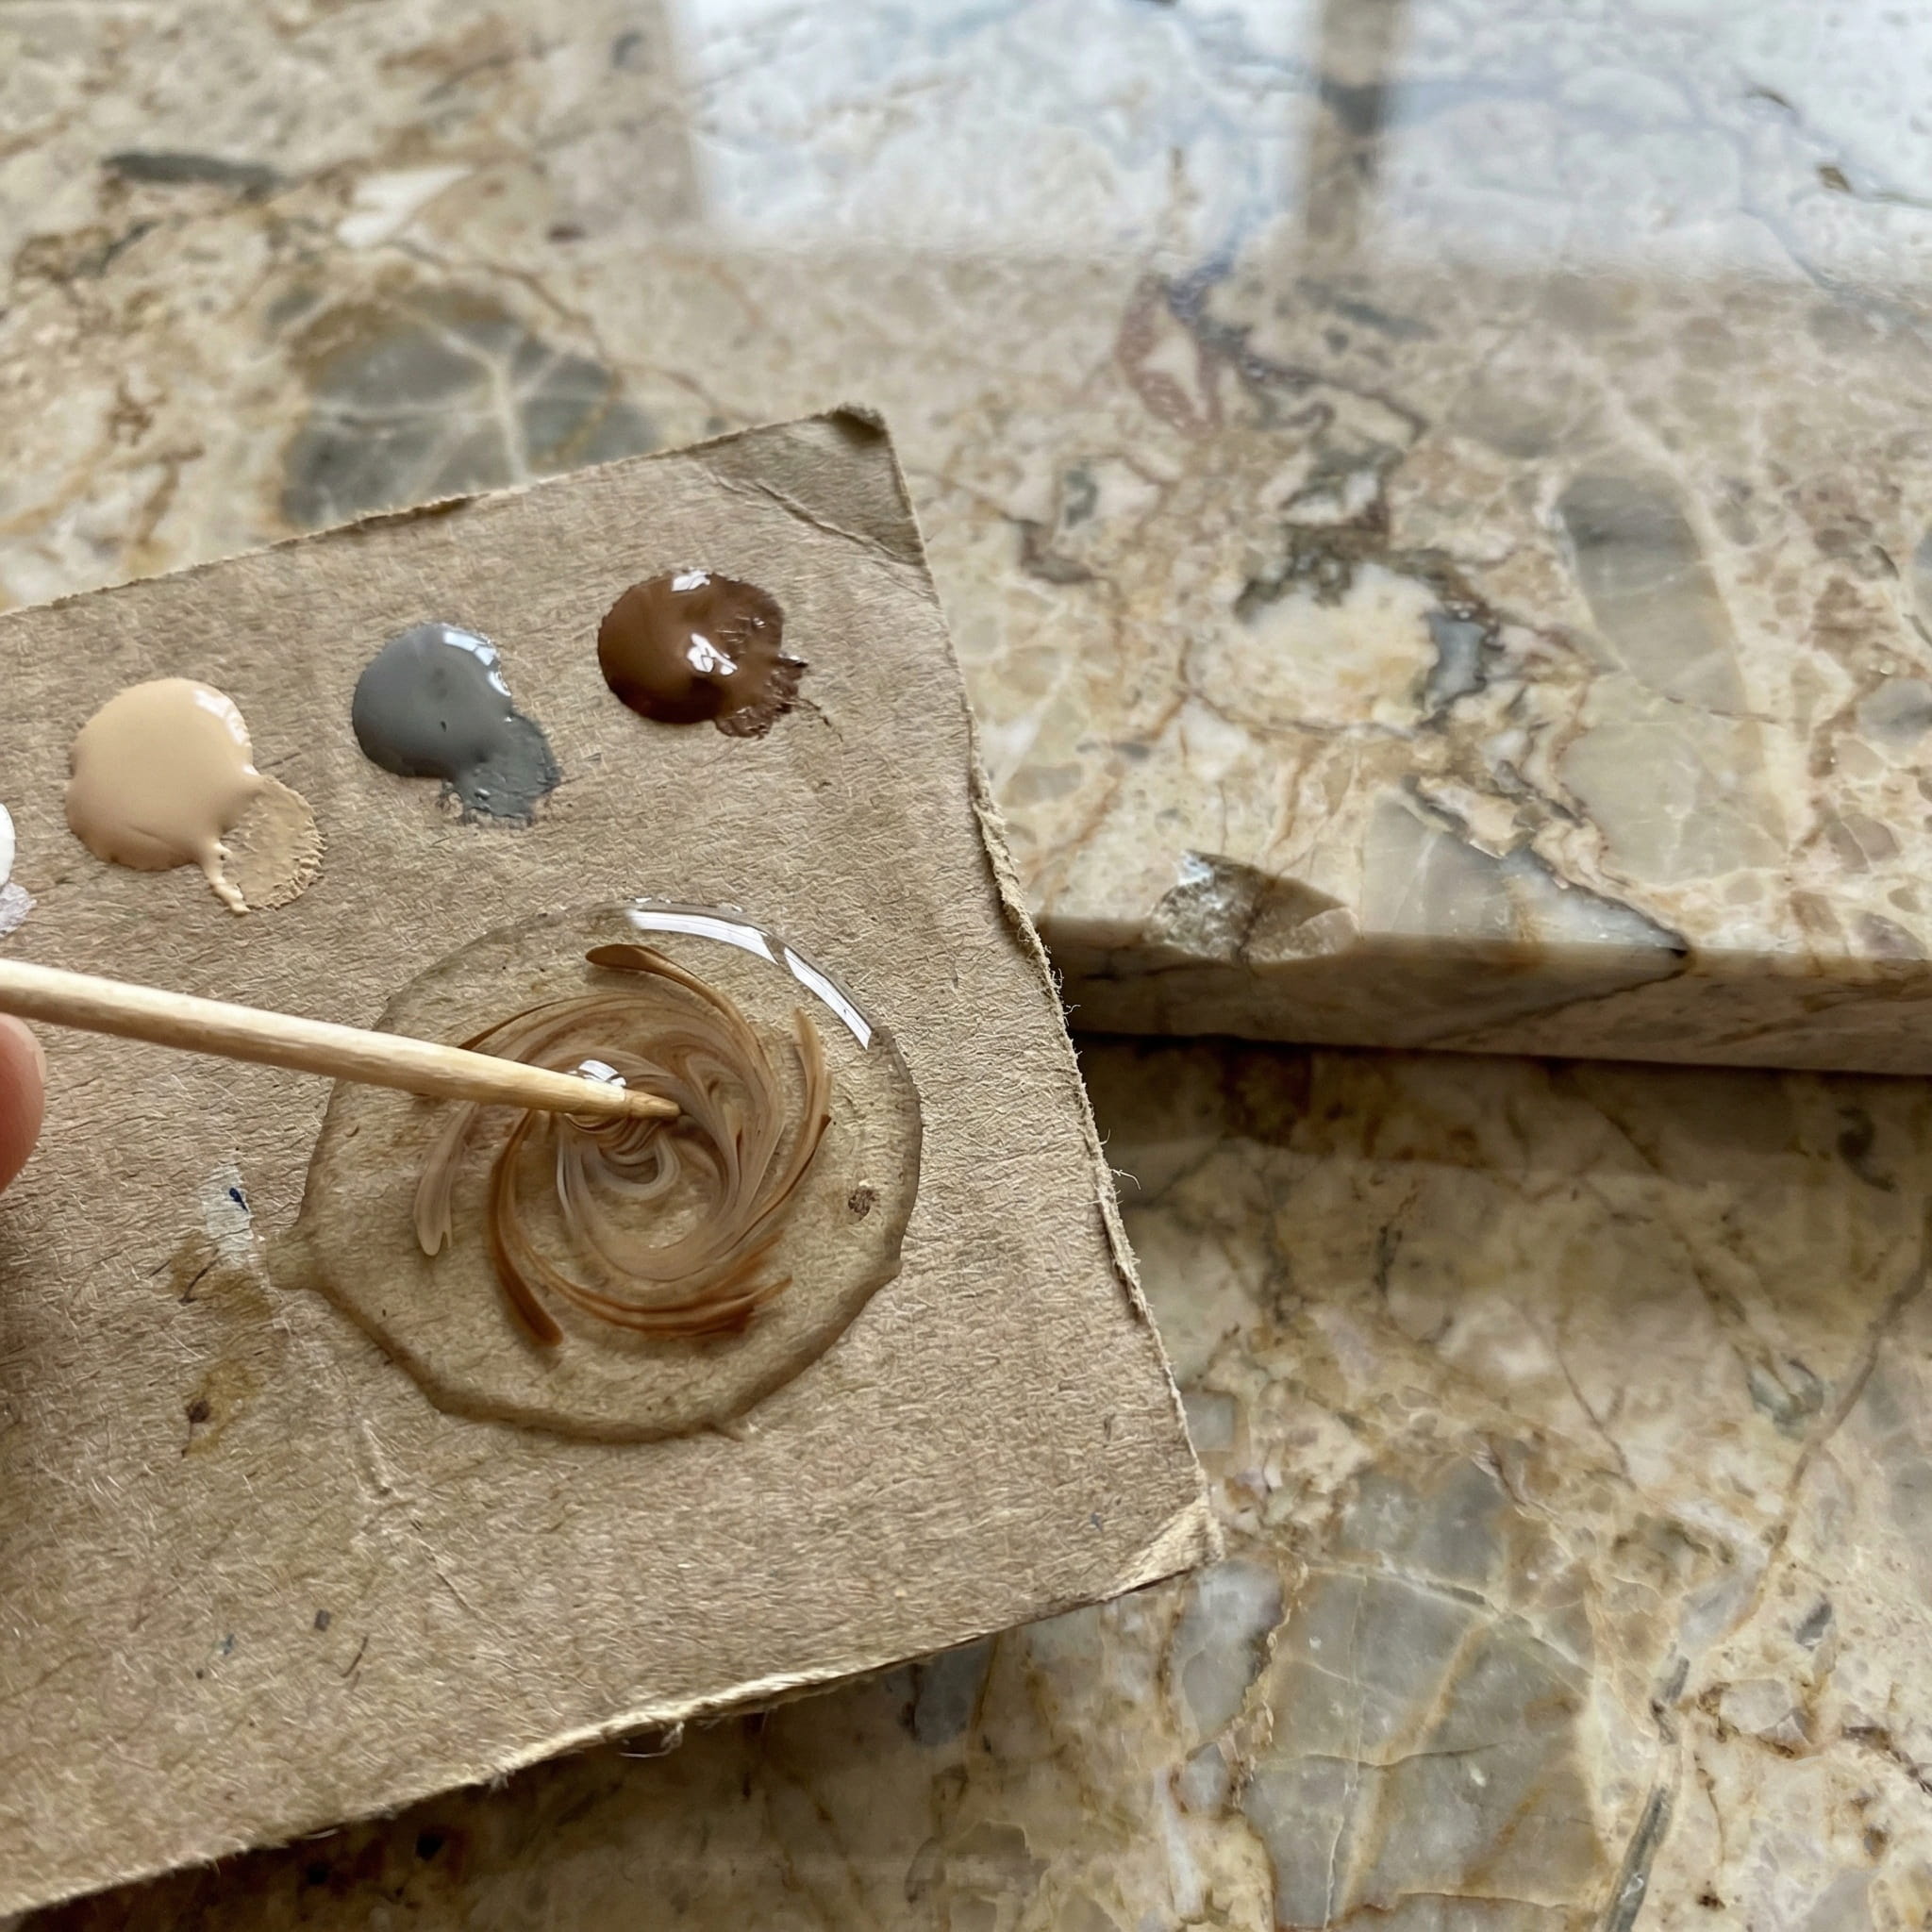
Most kits come with tintable dyes. Mix the color before you add the hardener. If you are fixing a patterned area, you might need to do some painting tile work after the filler dries, using specialized tile paint. Dab it on gently to mimic the surrounding speckles or veins. Remember, it doesn’t have to be perfect; it just has to disappear from standing height. But if you’re feeling like Picasso on that way, show your skills on your bathroom floor tiles!
Step 5: Small Tile vs Large Tile Strategies
The size of your tile matters, and you need to know a little more about small tile vs large tile. With a large tile, repairing the chip is almost always the best option because prying up a 24×24 paver is a nightmare that risks breaking neighboring tiles.
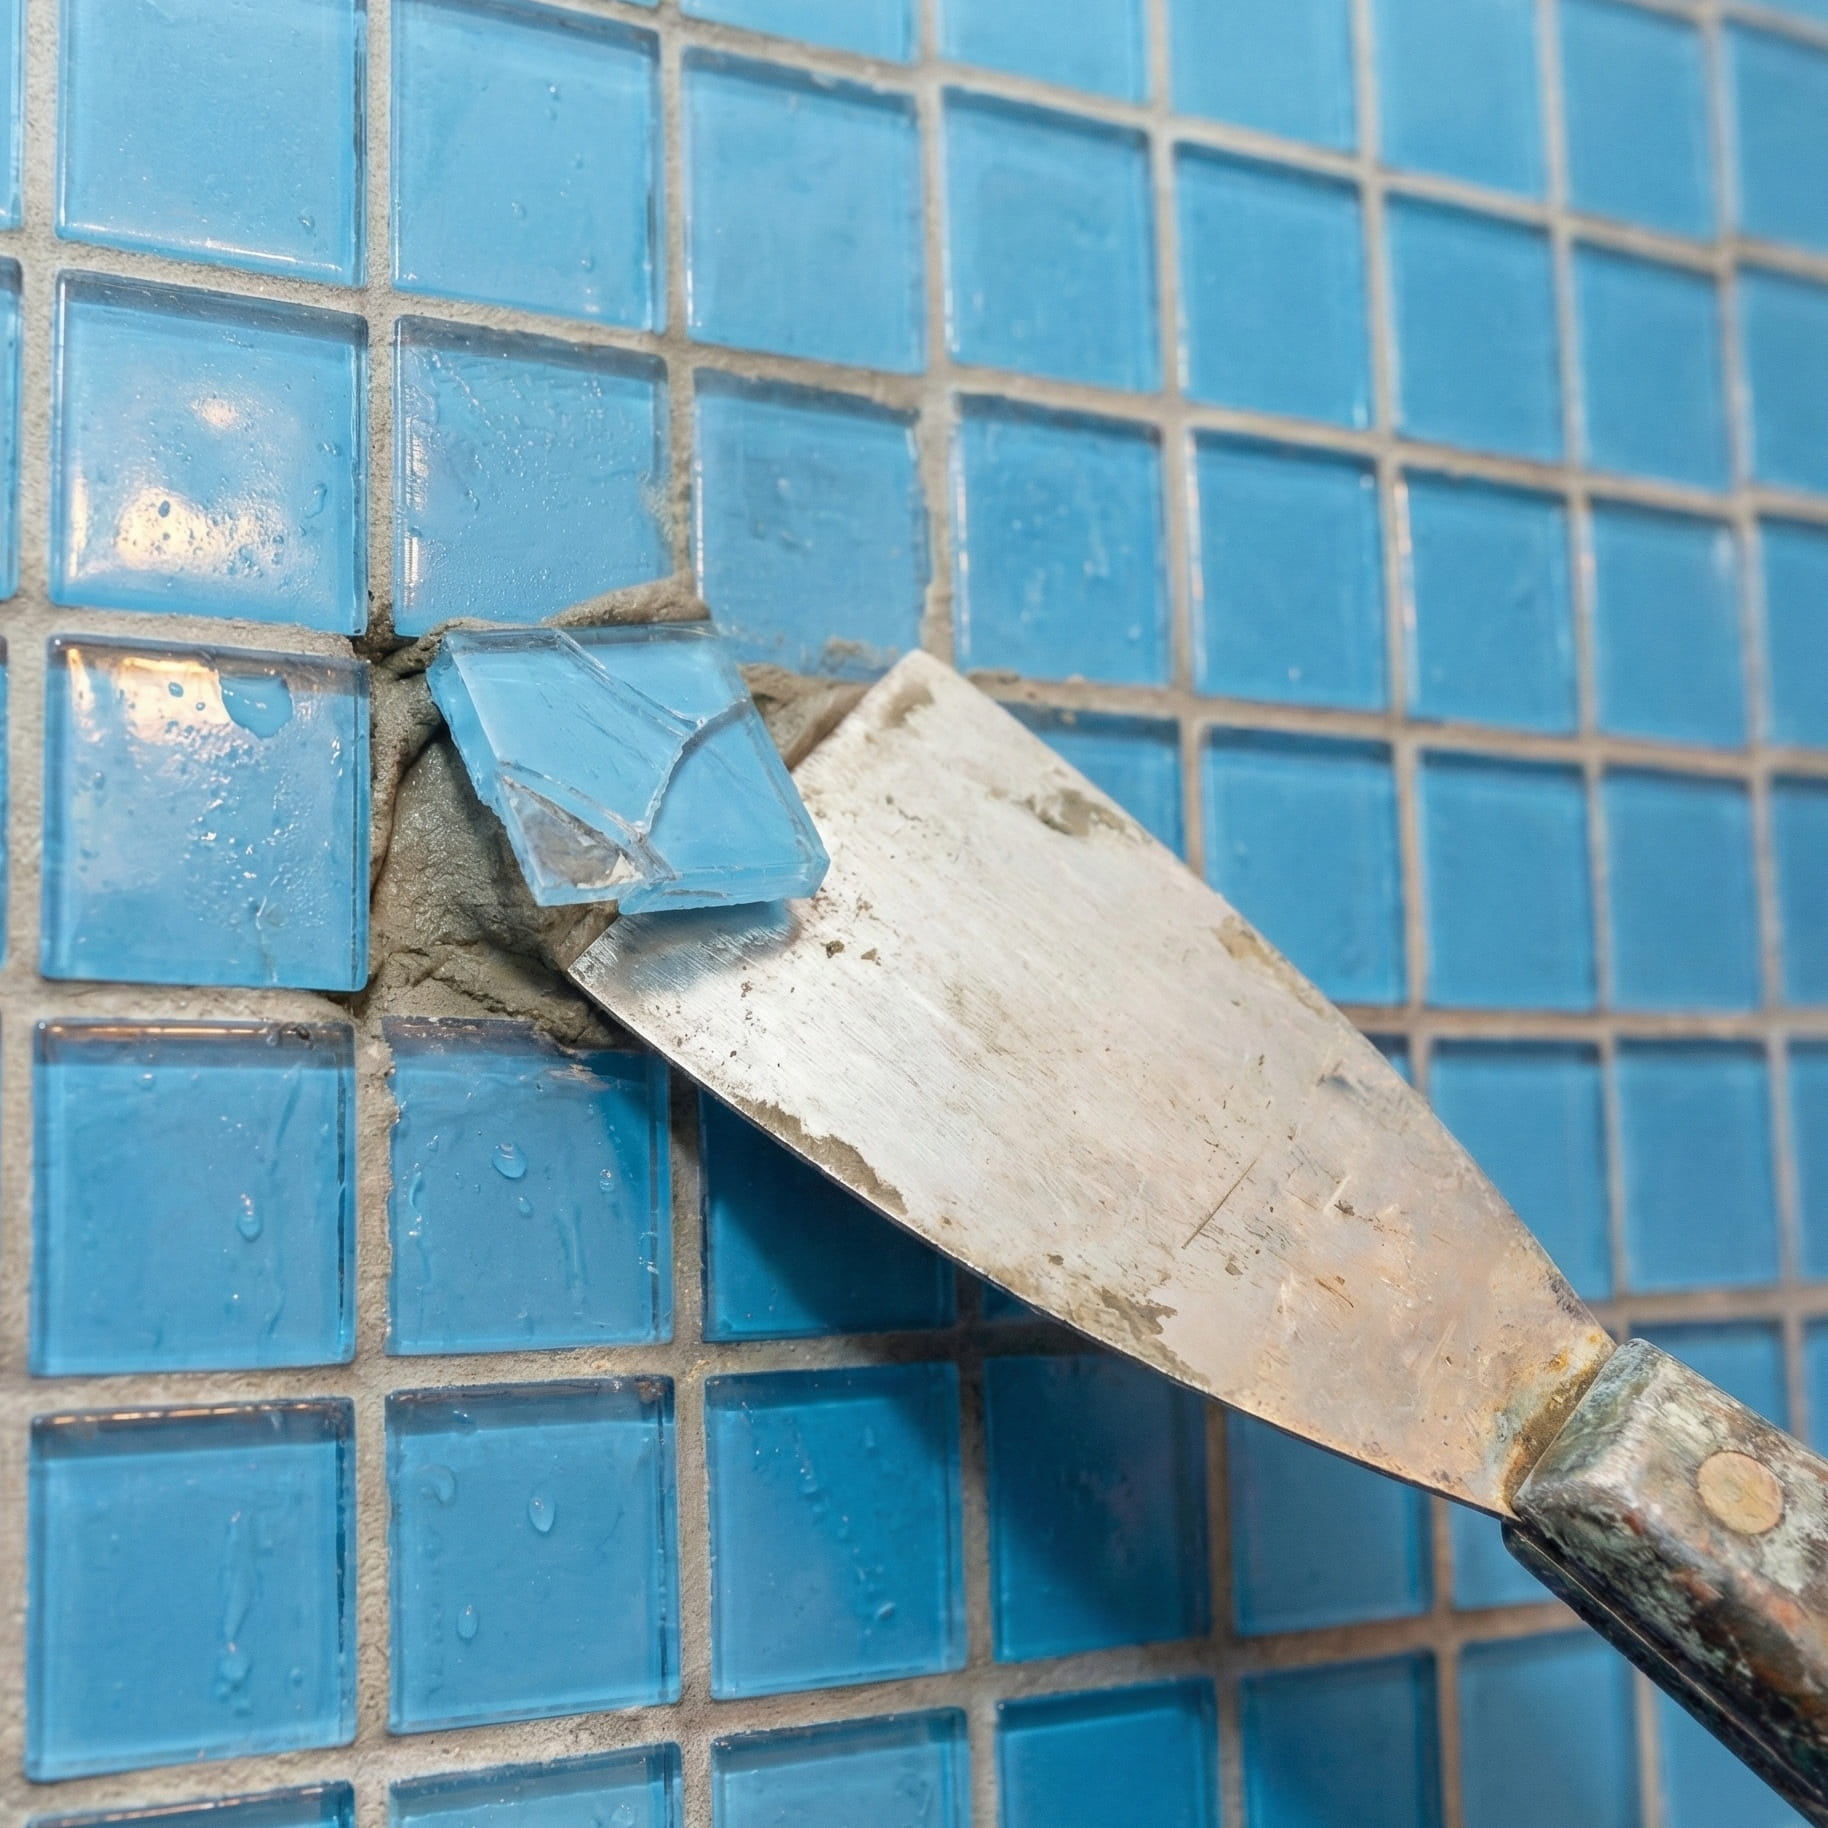
However, with mosaic tile or small tile scenarios, sometimes replacement is actually easier. If you have a sheet of mosaics and one tessera is chipped, it might be faster to pop that single piece out and glue in a spare. That’s where Stone Tile Depot enters the chat, our mosaic tiles are mesh backed, and thanks to that, you can easily replace your tile!
How Do You Know When to Replace and Where to Look?
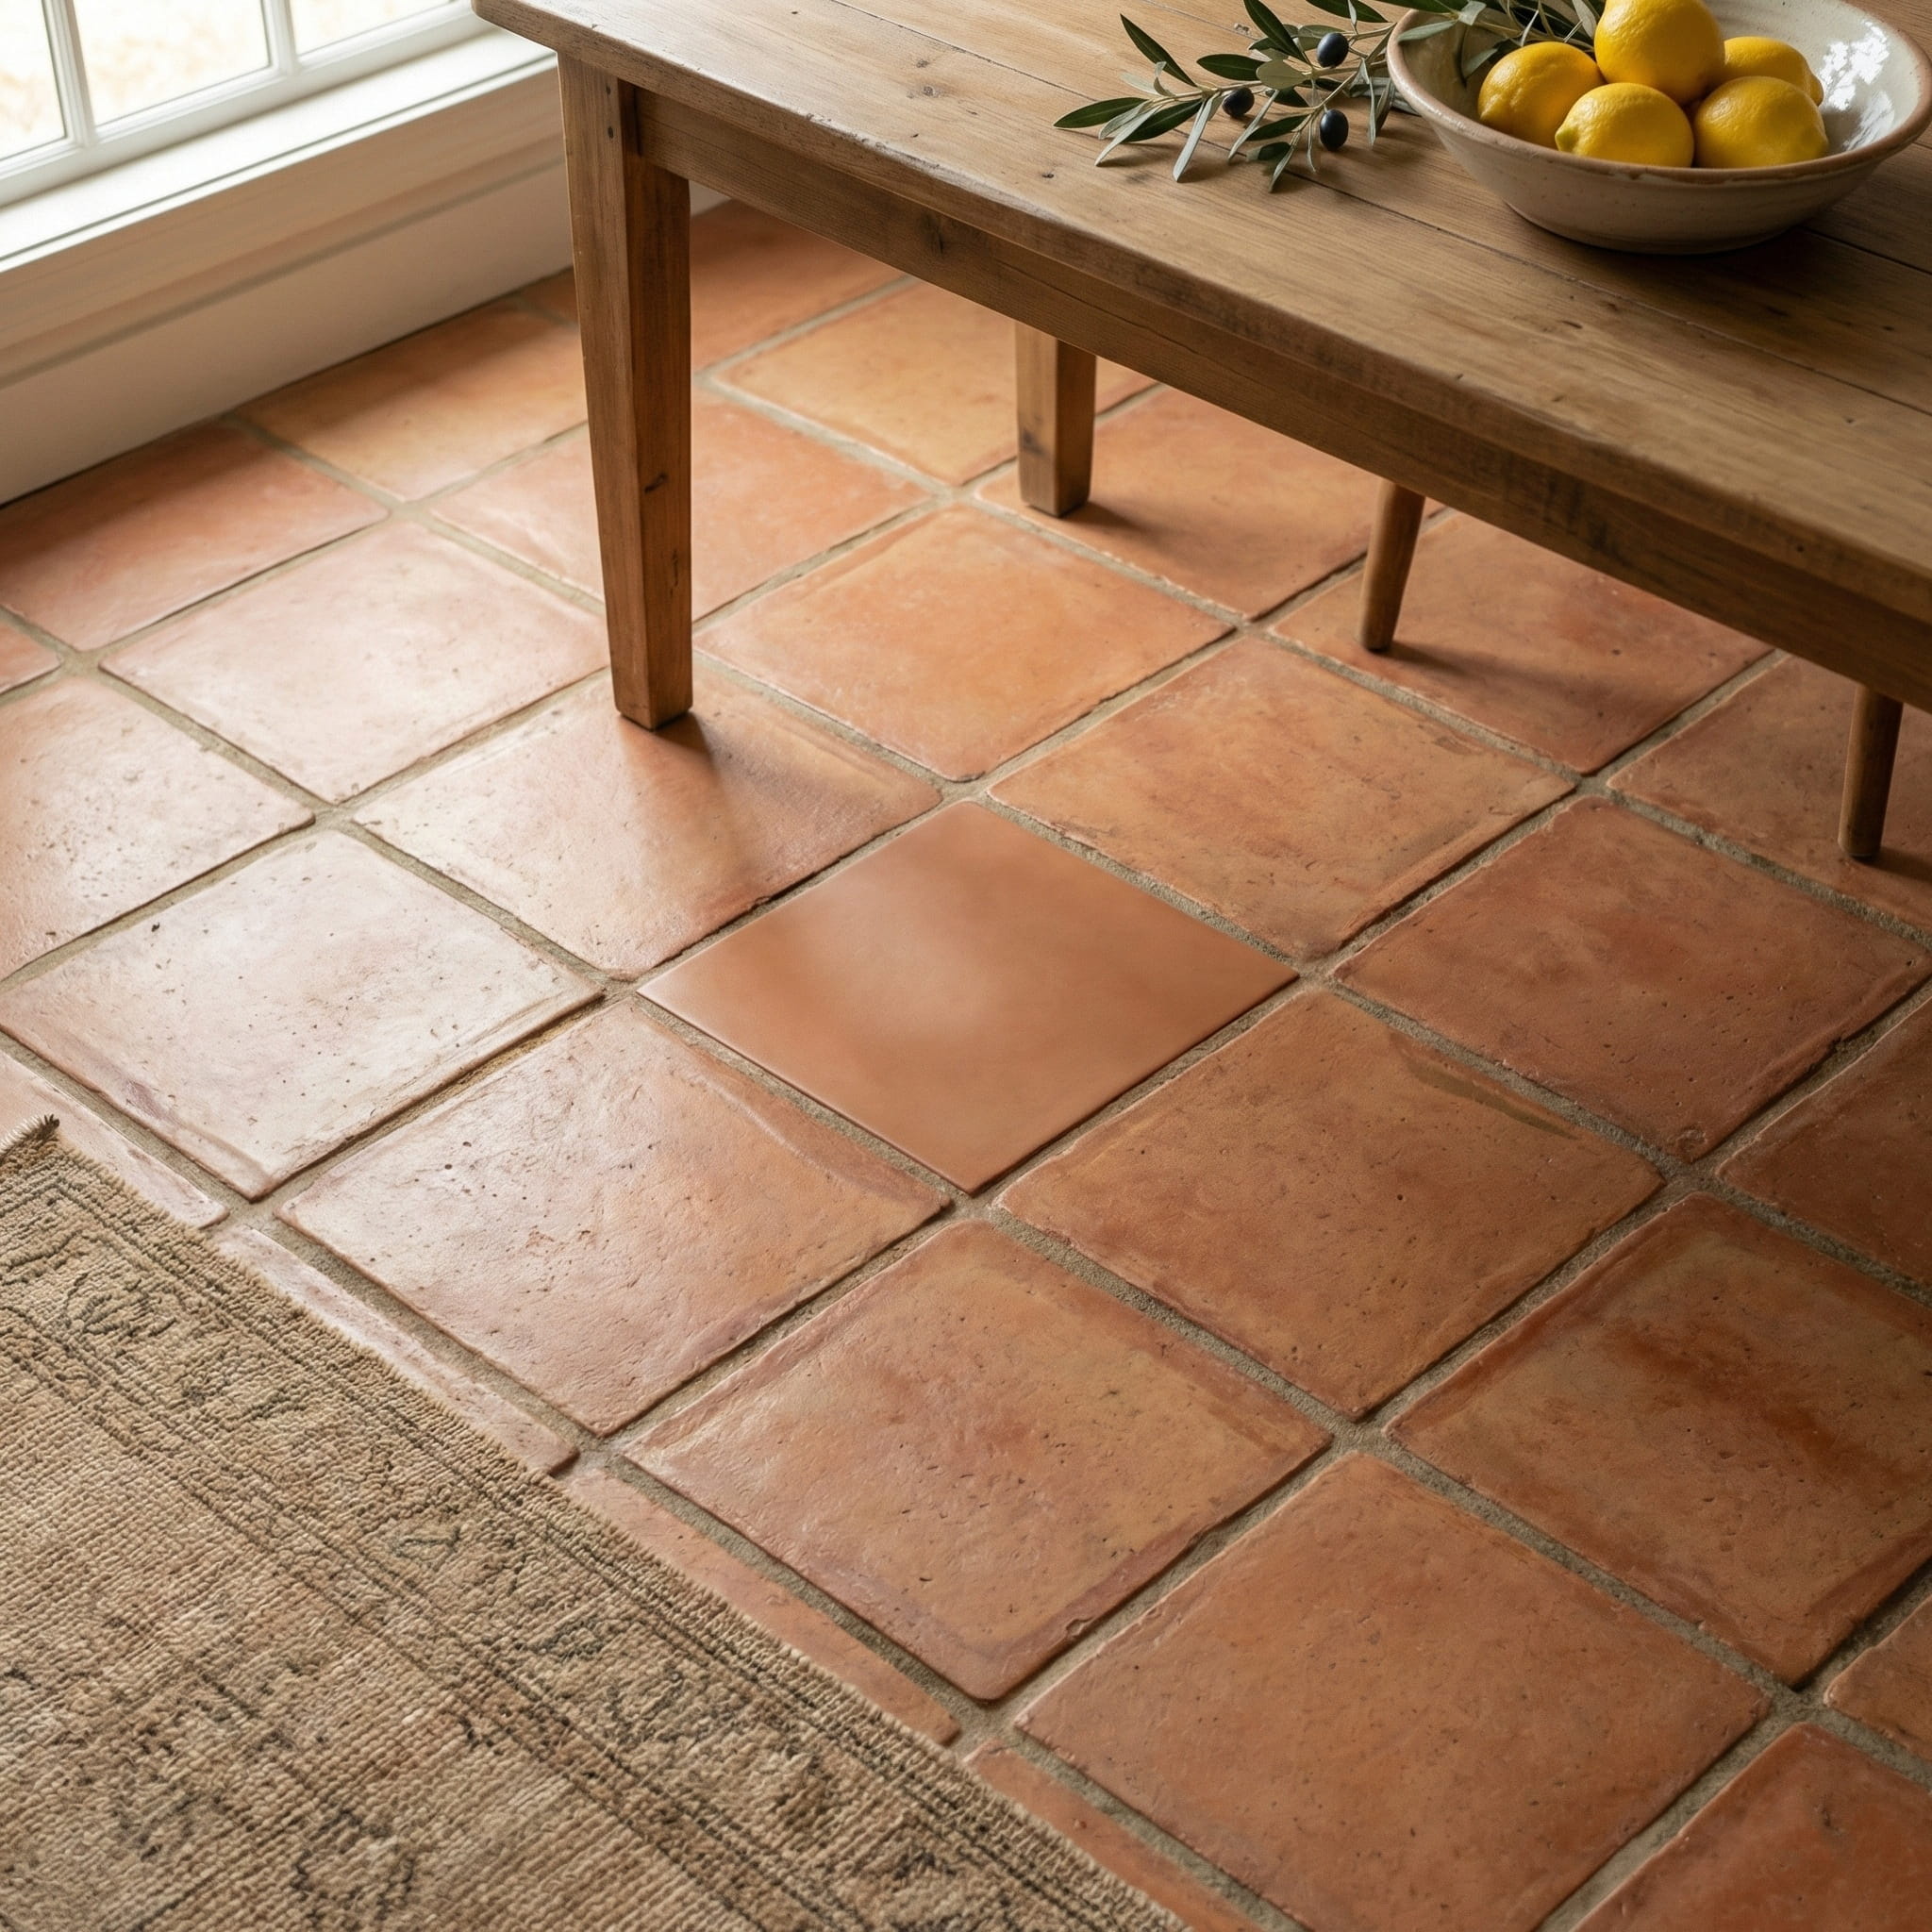
Sometimes, a tile is too far gone. If the chip is massive or the tile is shattered, a DIY tile floor patch job just won’t cut it. You need a replacement. This is where having a few spares saves the day. If you don’t have spares, don’t panic. Check our clearance tile section! We often stock matching batches or excellent alternatives that can blend in.
Need More Questions? Then, Call Us!
Learning how to fix a chipped tile isn’t rocket science. With a little epoxy, some patience, and steady hands, you can make that damage vanish like you’ve never dropped something heavy on your floors. Visit our clearance tile showroom to find the best matching piece, or just call us to learn more!